There and Back Again...and Again and Again Ch. 3
A full duplex has 2 driveways
The easiest way for Bob to respond to a messages from Alice is to rebuild the entire message mover going back in the opposite direction, so that there are 2 of everything. Each side has both a letter sender and a letter receiver, a bit sender and a bit receiver, and there are 4 wires spanning the distance between them.
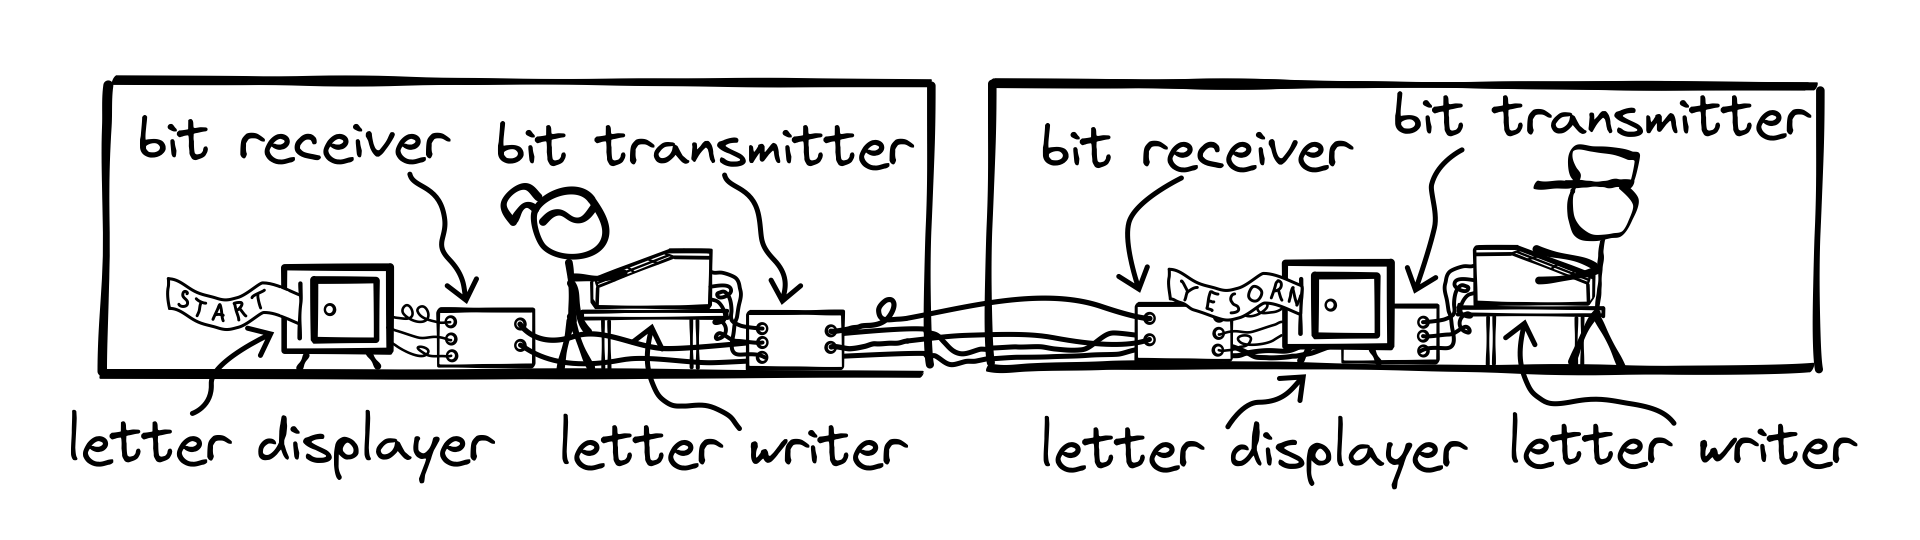
A messaging system that allows messages to be passed in both directions is called a duplex communications system. A duplex system that consists of 2 communication channels that can both operate simultaneously, like the system in the previous drawing, is called a full-duplex system.
There’s a big problem with this system though. One of the major expenses in operating a message passing system like ours is the cost of running and maintaining the wires between both ends. Our little example only takes a few feet of wire, so this cost is negligible, but imagine that Bob and Alice are hundreds of miles apart. We’d have to use higher voltages and repeaters to handle that range, and if we go with the full-duplex system, we’d need two of everything.
What if we could pass messages back and forth without doubling up on all the transmission infrastructure?
A half-duplex gets less than half as much credit as it deserves
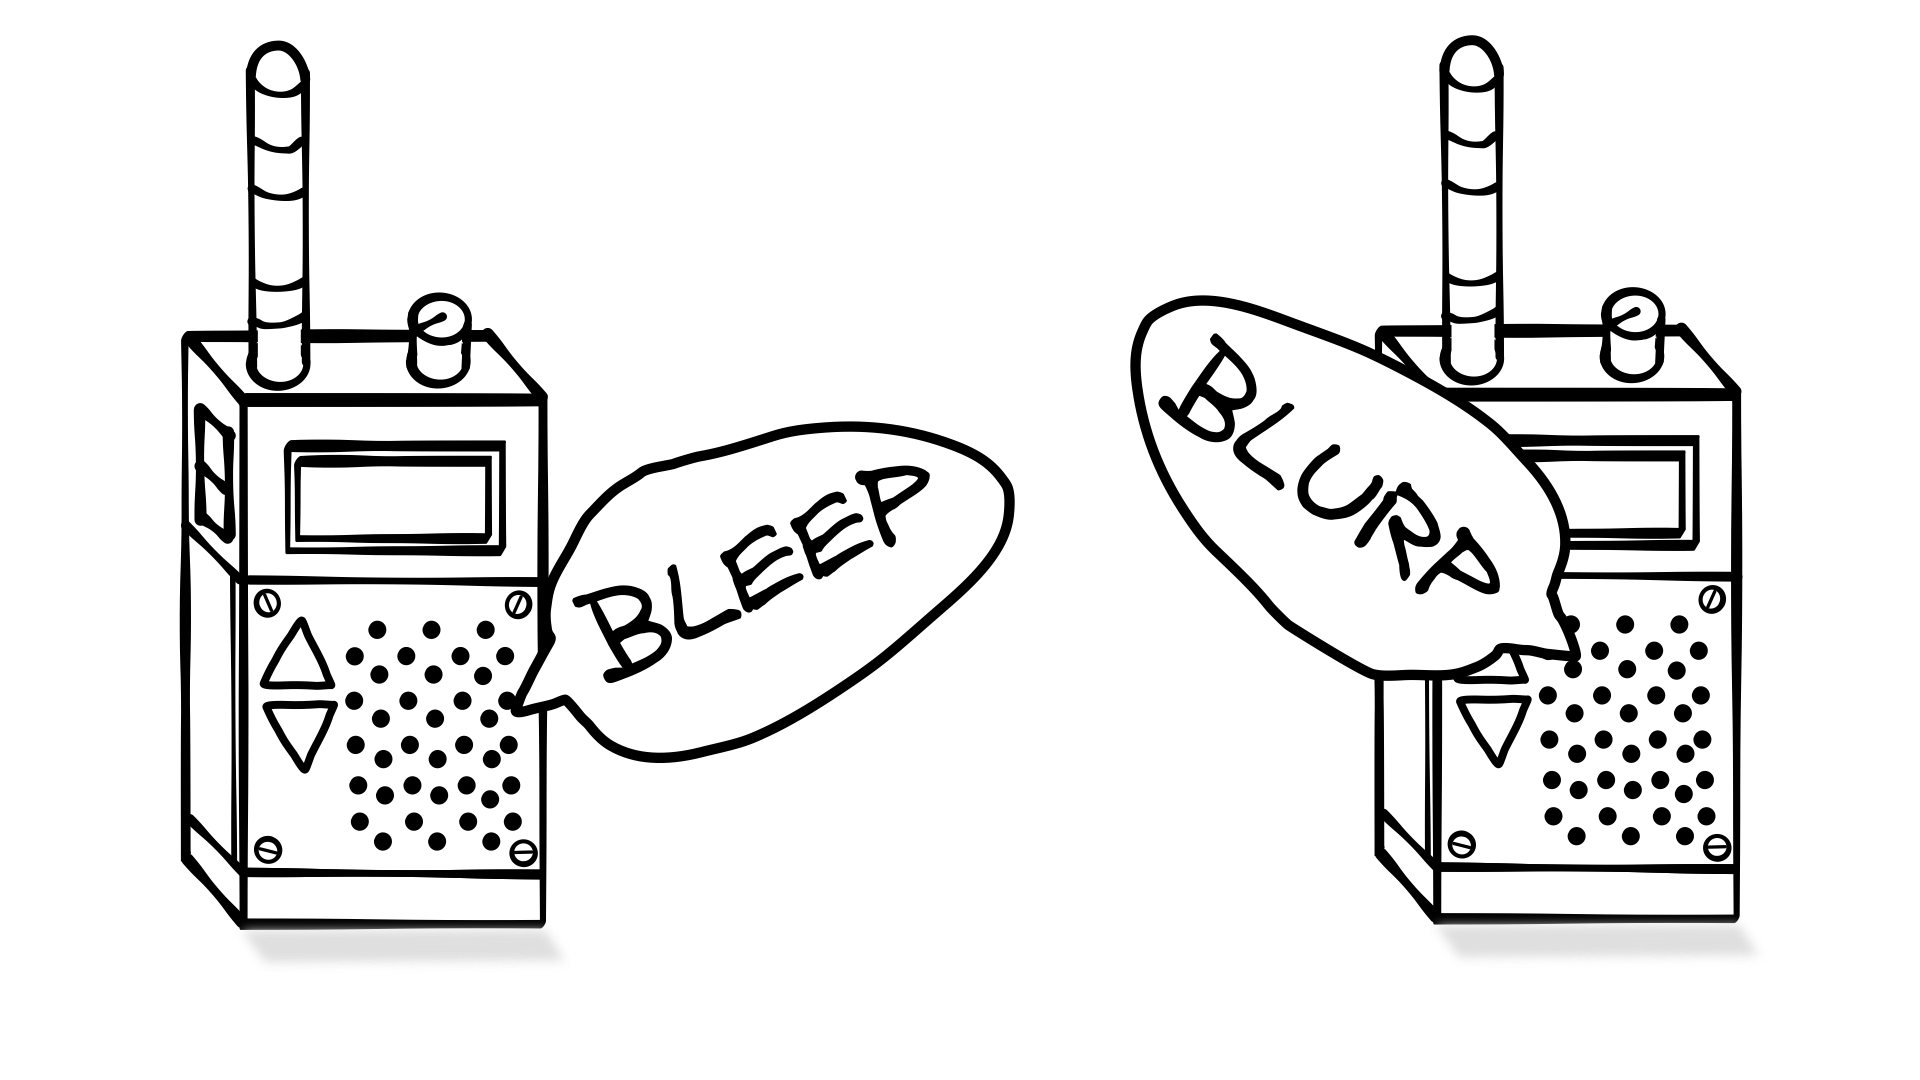
A half-duplex system is one that allows us to pass messages in both directions, but not simultaneously. A walkie-talkie is an example of a half-duplex system. You hold down a button to talk. While you are talking, the walkie-talkie goes into transmit mode and can’t receive any messages. The end result is that only one person can talk at a time. If both people try to transmit at the same time, both messages are lost.
If we build a half-duplex system, both Alice and Bob can send messages, but neither can send a message at the same time. This allows them to share the wires that run between them instead of needing to run a second set.
To turn our system into a half-duplex 2-way system, we need to make a few changes. Right now Alice has a bit transmitter and Bob has a bit receiver. Let’s combine both of those into one device that can both transmit and receive. We’ll call it a bit transceiver. A transceiver is a generic name for any device that both transmits and receive. If we look inside our bit transmitter, we see a 12v transmitter component. We can replace that with a 12v transceiver.

The Reference pin is always tied to ground, but Signal pin can act as either an input or an output. We need a way to control that, so the 12v transceiver has an Enable pin. When Enable is set high, the transceiver is in transmit mode. When Enable is set low, the transceiver is in receive mode.
While in transmit mode, the Signal pin drives the value on that pin. By drive we mean that the Signal pin sets the value of itself and any wire connected to it. If 2 pins are connected to each other and one pin is trying to drive the value high and the other is trying to drive it low, this will cause a short circuit (too much current flows between high and low values). So when Enable is low and the transceiver is placed into receive mode, the Signal pin stops attempting to drive the value. As long as only one side is in transmit mode at a time, a short circuit won’t occur.

What happens if neither side is driving the value? That is, what happens when both sides are in receive mode at the same time? By default the pins will have no defined value. They are said to be floating. While a pin is floating, the value can rapidly switch back and forth between 1 and 0, or it can take on undefined voltage values.
While in receive mode, the Signal pin operates as an input, so if the Signal pins are floating, the values flipping back and forth can create false data or errors. To avoid this, our Signal pins have built-in electrical components that pull their values down to ground (0v/low) if no other pin is acting to drive the circuit. This essentially gives them a default value of 0v. This works for us because 0v is also our idle value. If neither side is transmitting, the circuit is idle and Signal will read 0v.
We have 2 more pins that weren’t on our 12v transmitter–TX short for transmit, and RX short for receive (you can look up why they have Xs in the name, but no one really knows for sure. TX and RX are just generally accepted abbreviations). While in transmit mode (Enable is high), RX acts as an input and TX does nothing. RX receives a signal from the microcontroller and uses that to determine the output value of Signal. If RX is high, Signal is high. If RX is low, Signal is low. It works exactly the way High/Low does with the 12v transmitter.
While in receive mode (Enable is low), TX acts as an output and RX does nothing. TX transmits a signal to the microcontroller based on the input value from Signal. If Signal is high, TX is high. If Signal is low, TX is low. It works exactly the way High/Low does with the 12v receiver.

Remembering how to differentiate between RX and TX is tricky. RX and TX are dependent on your frame of reference. They are always from the point of view of the device they are part of. The transceiver receives input values on its RX pin, and transmits output values on its TX pin.
Teleprinters can definitely run Doom
We’ve combined our bit transmitter and bit receiver into a bit transceiver. Can we combine the letter writer and the letter displayer into one device as well? Sure we can. The resulting device will allow us to send messages as well as receive messages that will be printed out, so we’ll call it a teleprinter.
Let’s do a quick overview of how the teleprinter system works. Alice presses a key on the teleprinter. The keyboard sends a signal to the teleprinter’s microcontroller, and the microcontroller looks up the letter in the binary table. Next the teleprinter’s microcontroller sends the the first digit representing the letter to the bit transceiver. Then the bit transceiver’s microcontroller enables the 12v transceiver and uses it to send the binary digit across the wire to Bob’s bit transceiver. Bob’s bit transceiver receives the bit, and sends it to Bob’s teleprinter.
Alice’s teleprinter repeats this process 4 more times until all 5 bits have been sent to Bob’s teleprinter. Once the 5th digit arrives, the microcontroller in Bob’s teleprinter looks up the letter represented by the 5 bit sequence, stores the letter in its memory buffer, and begins to print it out. If Alice continues typing more letters, those letters get stored in the receiving teleprinter’s memory as well. Each letter will be deleted from the buffer once it has been printed out. If Alice continues typing faster than the printer can print, the buffer will keep filling up until either she stops typing or it runs out of memory and begins dropping letters. In our case our buffer can store 150 characters, so it should be enough to handle short messages without issues–provided Alice isn’t a really, really fast typist.
Collision elision
What happens if Alice and Bob both try to send a message at the same time? If it lines up exactly so that neither one types a letter at nearly the same time, it would just work. But the more messages they send, the more likely they are to type concurrently and cause a collision.
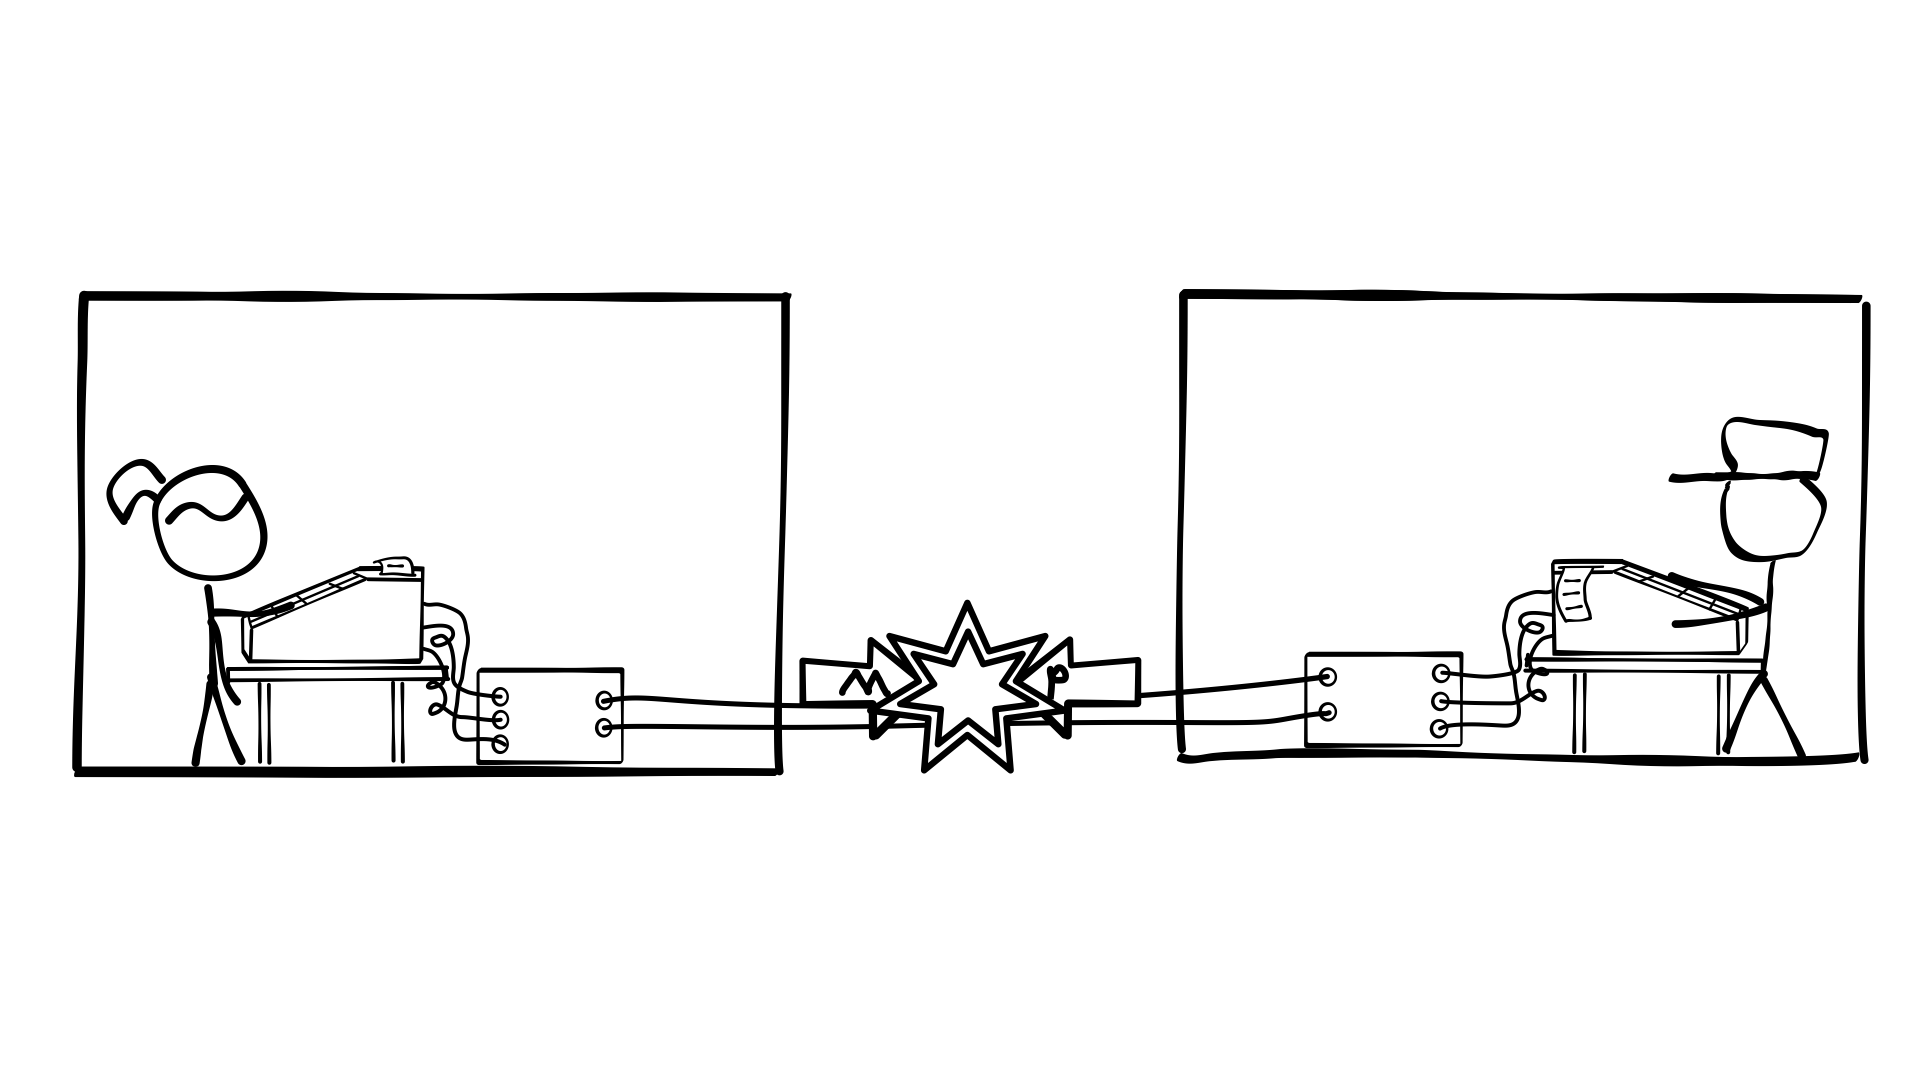
A collision happens when the 12v transceivers on both sides are both trying to transmit at the same time. Depending on how the transceivers were designed, this could result in big problems, like short circuits or lost bits (which is more likely with modern equipment that is designed to protect against short circuits and other structural problems). If one or more bits are lost, then the receiving teleprinter could either just skip that letter, print an error character instead of the correct letter, or send out an error beep. Since we’re the ones designing it, let’s say that it makes an error beep.
Avoiding these kinds of conflicts isn’t too difficult most of the time. We just need to tell Alice and Bob to wait until they are absolutely sure the other person is done with their message before responding.
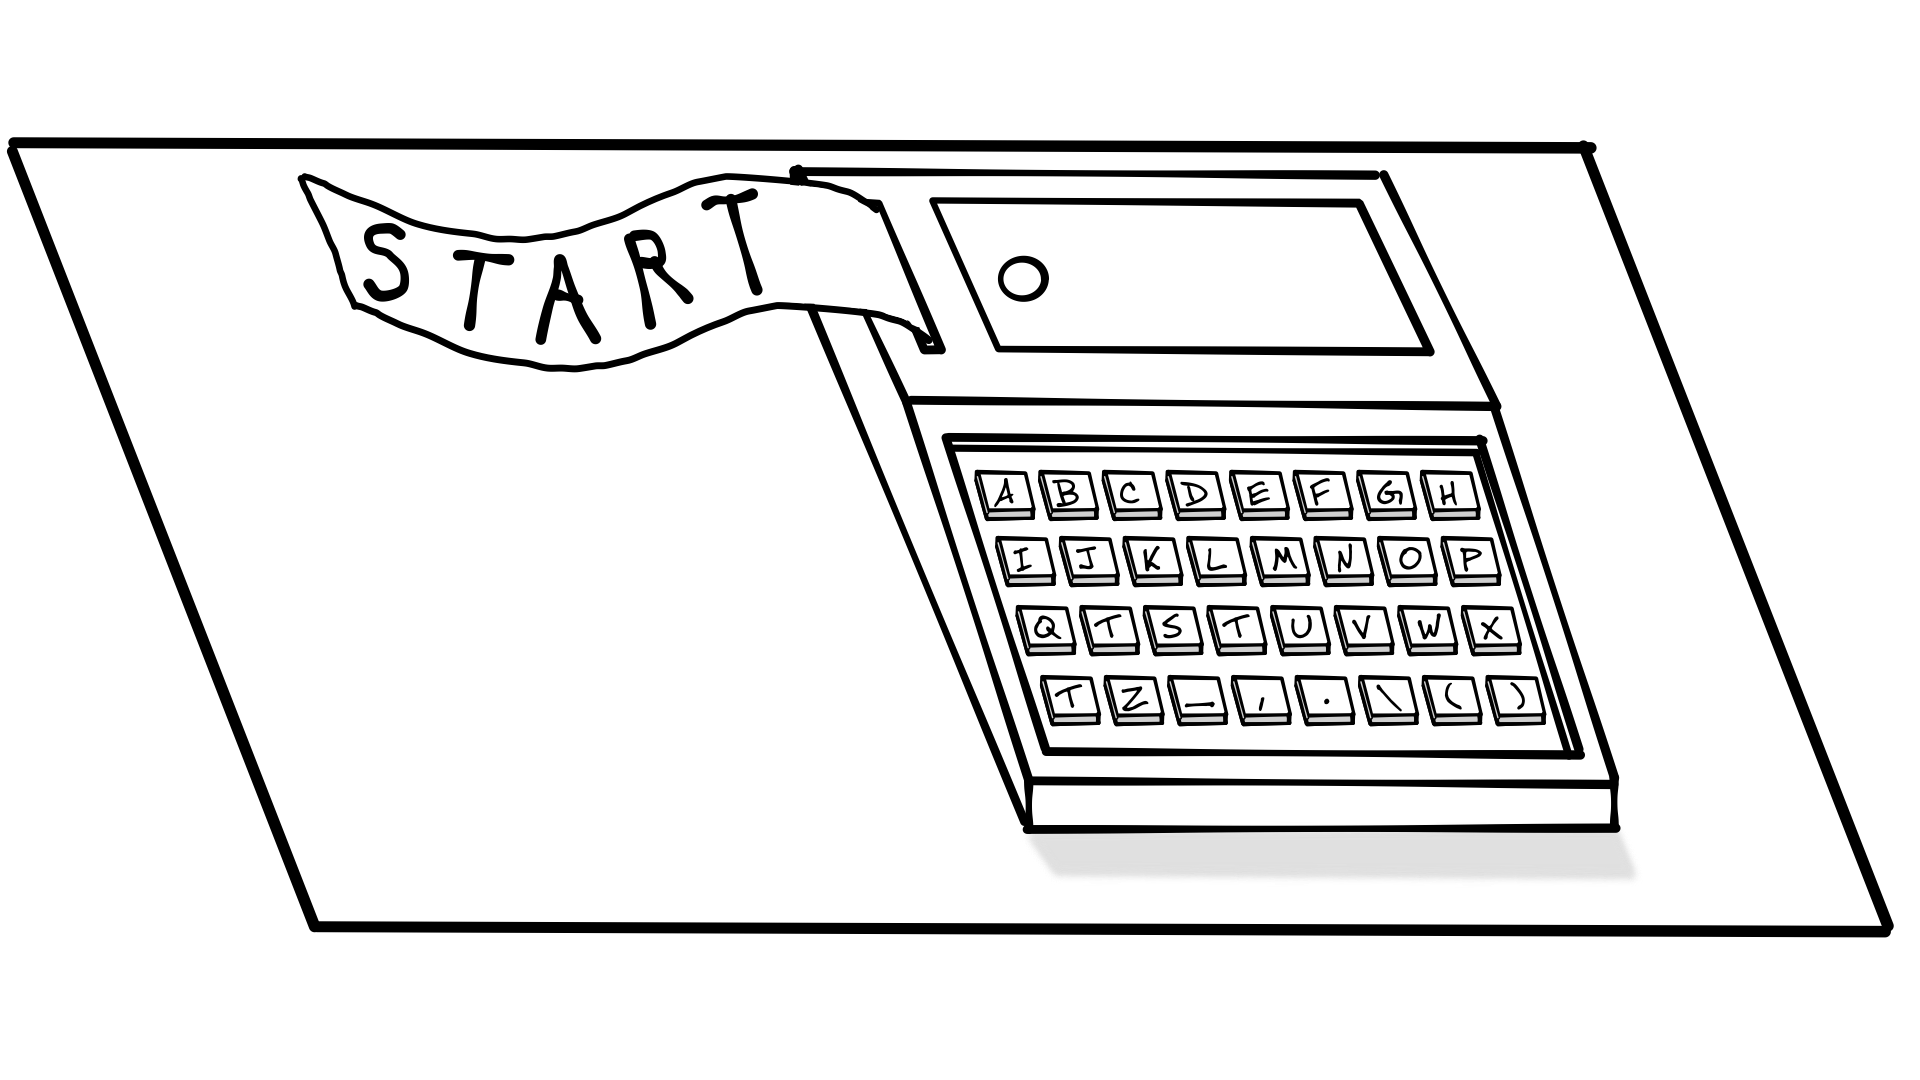
But how do we do that? Remember our stop and start bits? We can do something similar at the message level. We can agree ahead of time that every message must begin with the word “START” and end with the word “STOP”.

Congratulations! We’ve designed our first high level communication protocol. A communication protocol is a system of rules that allow 2 parts of a system to send data back and forth. We’ve already designed several lower level protocols–we decided that a red marble is a 0 and a green marble is a 1, that 12v is a 1 and 0v is a 0, that we need a start bit, a data bit, and a stop bit, and that a group of 5 bits represents a letter.
As long as Alice and Bob both follow the protocol, they’ll know when the other person’s message is done and they won’t interrupt it. Just like waiting for the other person’s walkie-talkie to beep before you start talking.
However, there’s still one problem. What if Bob and Alice both start a message at the same time? Our protocol doesn’t help us with this. We’ll still have collisions and lost letters. To fix this problem we’ll need to add some more rules to our protocol.
When someone wants to send a message, they type START. Then they wait for the other person to reply with OK. Once the first person has the OK reply, they can finish their message.

If the sender doesn’t get an OK reply (likely because the other person was trying to start a message as well and there were some dropped letters), they wait a few seconds and resend START. If while they are waiting they see that the other person sent START, they must reply with OK and wait for the other person to finish before sending their message.
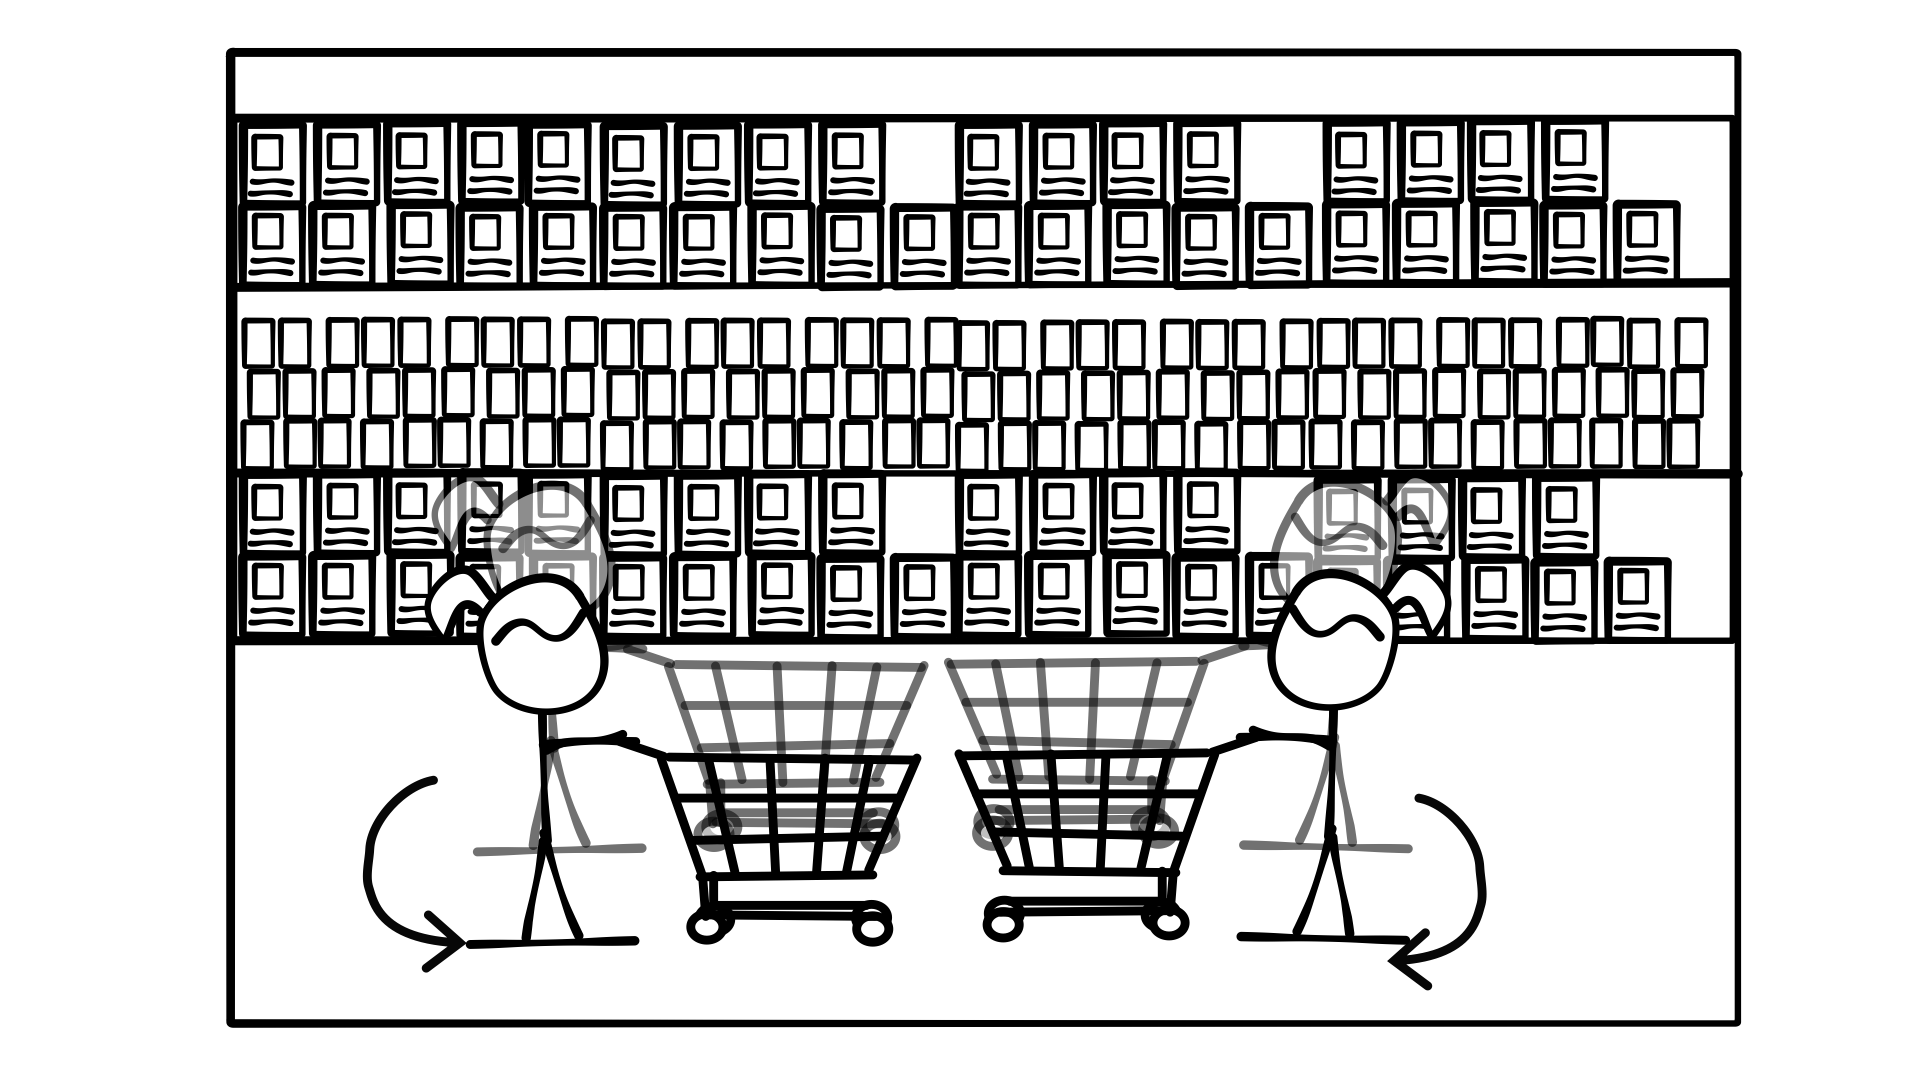
There’s still a problem here. Imagine a situation in which Bob and Alice both try to send a message at the same time, and then each one waits the same amount of time before retrying. Bob and Alice would get into a loop where each person keeps retrying at the same time and colliding. Just like what happens when 2 people are walking towards each other at the supermarket and each one keeps trying to go around the other one on the same side of the aisle.
To fix this problem, if the sender doesn’t receive an OK in response to their START, they must wait a random number of seconds between 1 and 10 before retrying. This ensures that neither person is likely to retry at the same time.
He heard him holler STOP!
Wait! There’s another problem with our protocol. What happens when we want to use the word STOP in our message? Imagine that Alice wants to send the following message to Bob:
DONT STOP BELIEVIN
She’ll follow our protocol and she’ll try to send:
START DONT STOP BELIEVIN STOP

But as soon as Bob sees the word STOP, he’ll think the message is over and Alice just send the word DONT. Naturally Bob will think this is the end of the message, and he’ll rip the tape off. He’ll also think it’s a weird message, and he’ll immediately start messaging back. Our beautifully orchestrated protocol will come crashing down.
The solution to this problem is to use some other word to signify the end of the message that isn’t allowed to be included in the message itself. But what word can you guarantee no one is ever going to want to send in a message? What about a made-up word with a symbol in it? Let’s use something like this:
\S
An S with a backslash before it, to represent STOP. The backslash in this case is an escape character. An escape character is a character that tells the person or computer reading the message that the next character after it does something special and shouldn’t be printed out. The escape character itself is also special in that it won’t be printed out.
Using this new system, Alice’s message above will look like:
START DON'T STOP BELIEVIN \S
You may ask, what happens if we want to include the \S in a message? Something like:
WE USE \S TO SIGNAL THE END OF A MESSAGE
Well it turns out there is an particularly elegant solution. We escape the backslash with another backslash.
START WE USE \\S TO SIGNIFY THE END OF A MESSAGE \S
In this case, the escape character backslash tells the machine or the person reading it to ignore the special meaning of the following escape sequence and just print it out.
To escape we must first become invisible
The \S is kind of ugly and it makes the message harder to read. Is there anything we can do about that? We could set up our teleprinters so they don’t actually print escape sequences. Instead of \S, we can instruct our teleprinter to print a line signifying the end of the message. We can even have it make the teleprompter make a sound to let the user know that it’s reached the end.
While we’re at it we could replace START with something else. \S is already taken but we could use \B (B for begin). We could replace that with a line too.
However, for now the receiver needs to manually handle start, and START doesn’t have the same problems as STOP did. If the receiver sees START appear again, as long as the message hasn’t ended, any additional STARTs after the first one are just considered part of the message. For now we’ll leave START as it is.
Longer messages
What if we want to send longer messages? For instance, what if Alice wants to type out a whole page to send to Bob? Horizontally scrolling tape gets a little hard to manage for something longer than a few hundred characters.
Let’s alter our teleprinters to print out multiple lines on a roll of paper.
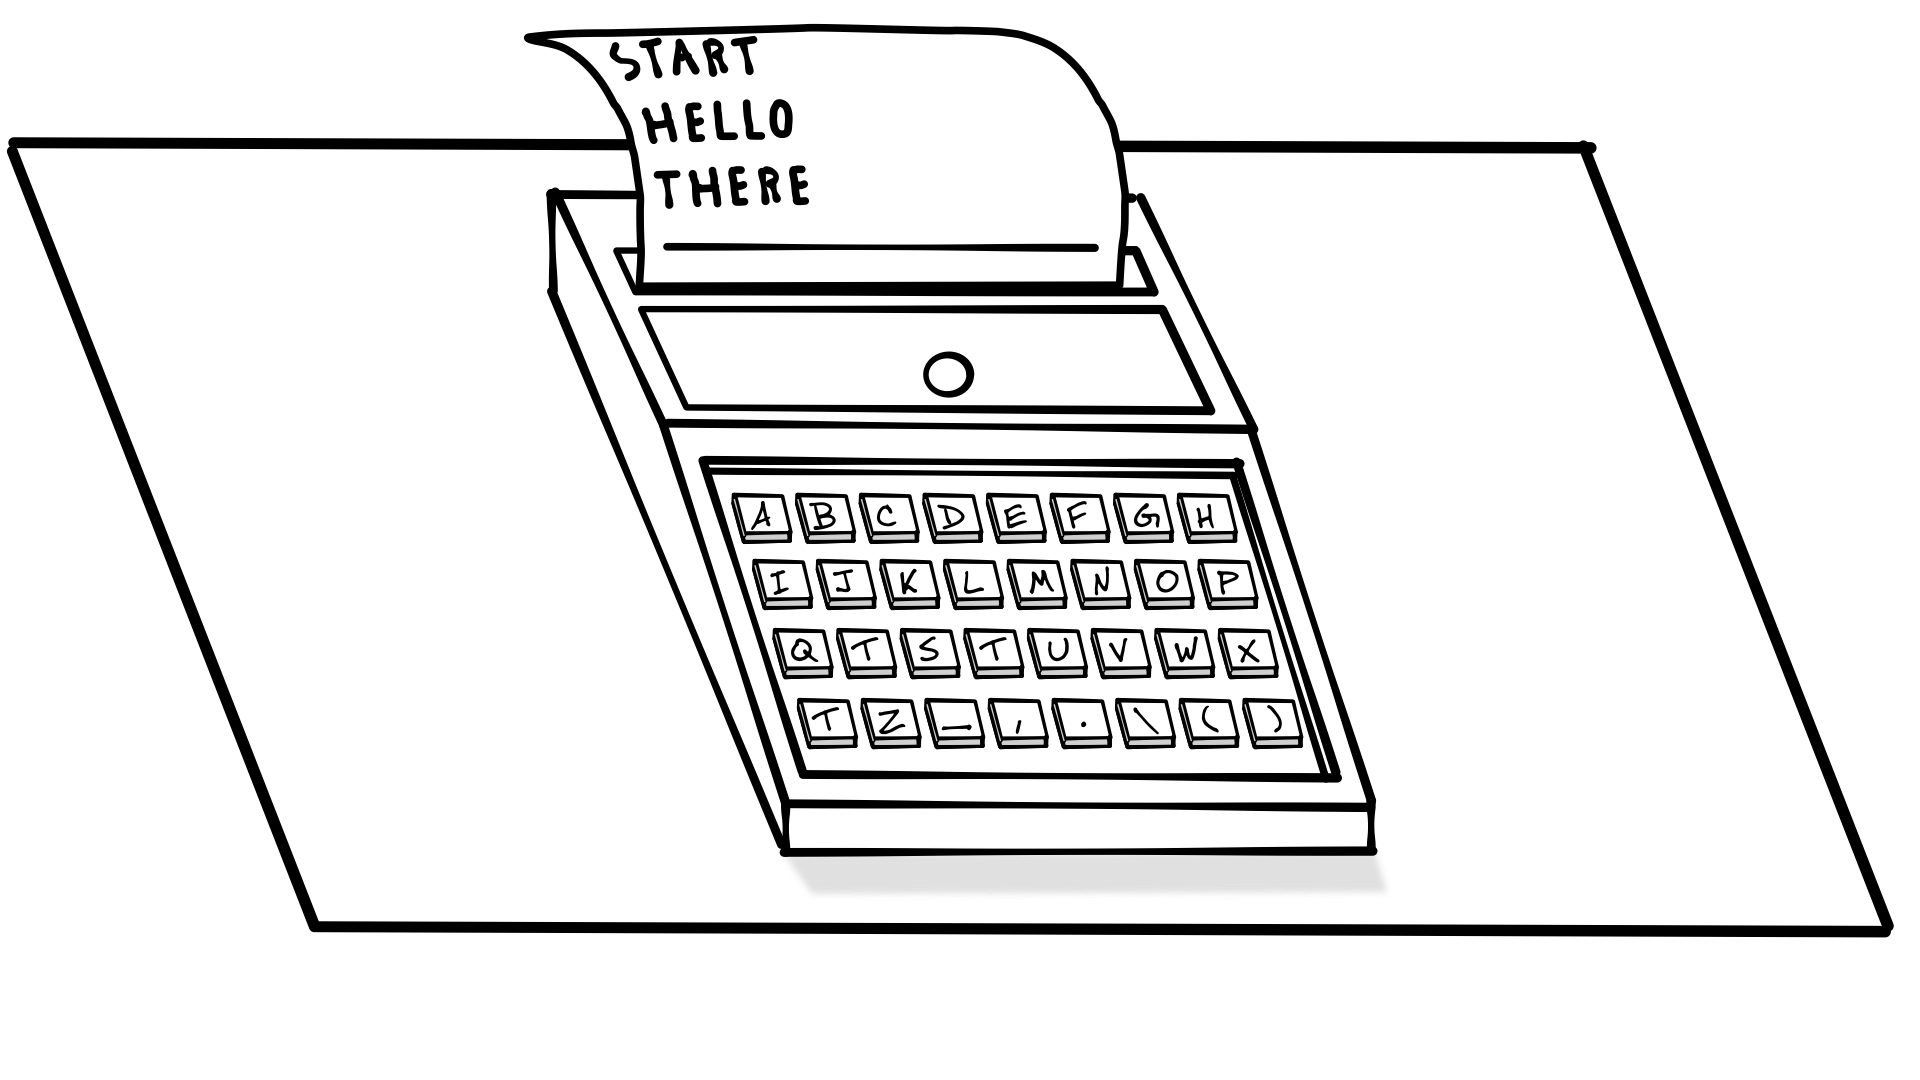
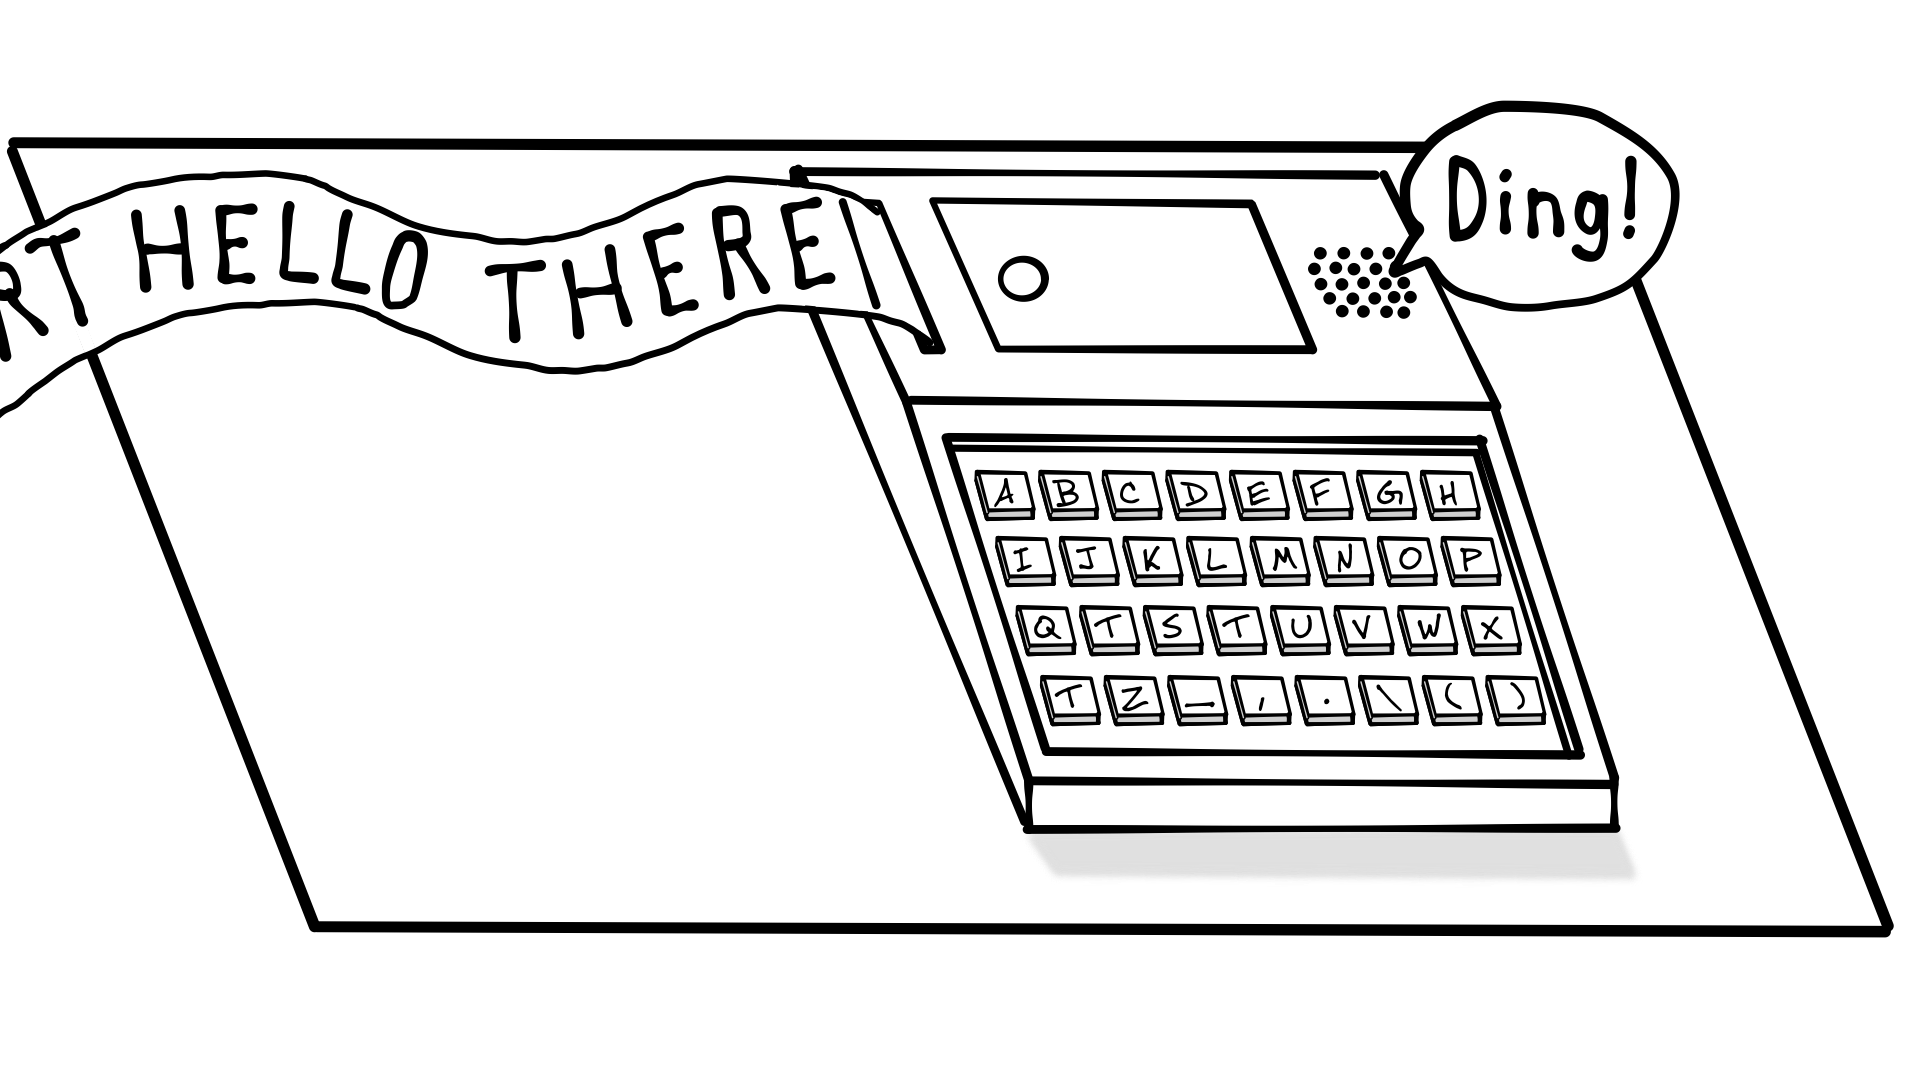
Our paper is wide enough to print 80 characters. If we get to 80 characters it will automatically wrap the next character onto a new line. If we want to manually start a new line, we can use another useful escape sequence “\N” to force the receiving teleprinter to start printing on the next line.
The above message was sent like this:
START HELLO \N THERE \S
Without the \N, HELLO THERE would have appeared on the same line.
Yesterday’s world of tomorrow is today
Our system can now come close to replicating the functionality of a state of the art teleprinter from the end of the 19th century. We’ve come a long way in a few short pages. We’ve compressed thousands of years of invention into 3 chapters, and we’re only half a century away from a full blown computer network!
We can send small bits of text back and forth. But what if we want to send and receive larger messages, or even entire documents? Hang around for the next chapter, and we’ll find out.